Construction Equipment, Repairing, Spare Parts, TYPHON Machinery
How to Repair a Mini Excavator: Step-by-Step 5 Easy Fixes
The mini excavator must be well-functioning to complete construction or landscaping projects efficiently. However, due to regular use, mini excavators can experience several issues over time. Daily identification and fixing of common problems can save you time and money on professional repairs. In the following few lines, we aim to provide a guide showing you how to repair a mini excavator in five easy steps using simple tools and basic troubleshooting techniques.
Common Mini Excavator Issues
Before diving into the steps of repairing a mini excavator, better understand the most common problems excavators most often face:
- Startup Issues
- Hydraulic System Issues
- Tracks Moving Issues
- Engine Overheating Issues
- Attachment Issues

Tools You’ll Need
To perform basic repairs, you may need the following tools:
- Screwdrivers (flathead and Phillips)
- Socket wrench set
- Hydraulic oil
- Replacement air filter or fuel filter (if required)
- Clean rags and work gloves
- Coolant
- Fresh fuel (if required)
Step 1: Clean or Replace the Air Filter
A clogged or dirty air filter can prevent your mini excavator from starting or cause it to run inefficiently. Cleaning or replacing the air filter is a simple fix.
How to do it:
- Locate the air filter on your excavator, usually near the engine compartment.
- Unscrew or unclip the cover to access the filter.
- Check the filter for dirt, debris, or oil buildup.
- Replace a paper filter with a new one, or clean a foam filter with warm, soapy water, then let it dry before reinstalling.
- Reattach the filter cover.
A clean air filter ensures the engine receives enough air to function correctly, helping prevent starting issues or rough performance.
Step 2: Check and Replace the Hydraulic Fluid
Hydraulic fluid is important for powering the excavator’s components. Low or dirty fluid can cause slow or erratic movement.

How to do it:
- Locate the hydraulic fluid reservoir, usually in the back or side of the excavator.
- Remove the cap and check the fluid level. If low, top it off with the recommended hydraulic oil.
- If the fluid is dirty or hasn’t been cleaned, drain the old fluid and refill it with fresh hydraulic oil according to the manufacturer’s instructions.
- Check for leaks in hoses or seals and repair them as needed.
Changing the hydraulic fluid helps the mini-excavator and other attachments move smoothly.
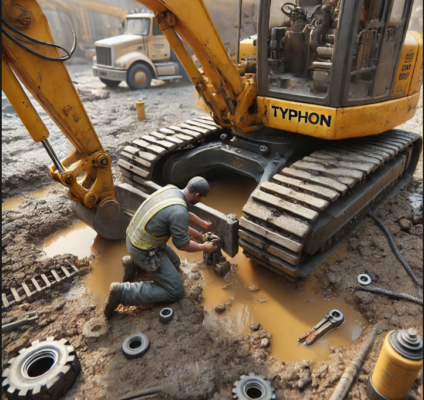
Step 3: Inspect the Tracks and Adjust the Tension
Loose or damaged tracks can affect how your mini excavator moves, making it less efficient on-site.
How to do it:
- Check the tracks for signs of wear, cracks, or damage.
- To adjust track tension, find the tensioning bolts near the tracks.
- Tighten or loosen them as needed to ensure the tracks are properly tensioned. For the ideal tension settings, refer to your manual.
- If tracks are damaged or worn, they may need replacing.
Well-maintained tracks ensure smooth movement and improve your mini-excavator performance.
Step 4: Check the Cooling System
An overheated engine can cause serious damage, so it’s essential to maintain the cooling system.
How to do it:
- Check the coolant level in the reservoir. If it’s low, it will be with the recommended type of coolant.
- Inspect the radiator for any blockages or dirt buildup that could restrict airflow. Clean it if necessary.
- Ensure the fan is working properly to avoid overheating.
Keeping the engine cool is vital for preventing breakdowns and extending the life of your mini excavator.
Step 5: Check and Replace the Fuel and Oil
Old or contaminated fuel can lead to engine problems, and neglecting to change the oil can damage the engine over time.
How to do it:
- If your excavator hasn’t hasn’t in a while, drain the old fuel from the tank and refill it with fresh diesel.
- Remove the dipstick and check the oil level. If it’s low, it’s dirty, drain the old oil and refill it with fresh engine oil.
- Ensure the fuel filter is clean, and replace it if you notice debris buildup.
Regular fuel and oil changes are crucial for maintaining the health of your mini excavator and ensuring smooth operation.
Additional Maintenance Tips
Regular maintenance on your mini excavator can prevent many common issues before they develop into larger problems. Here are a few more tips for keeping your mini excavator in excellent condition:
- Clean the undercarriage after each use to prevent dirt and debris buildup.
- Regularly inspect hoses, belts, and other components for wear and tear.
- Check for hydraulic leaks and address them promptly.
- Lubricate pivot points and joints to keep the machine running smoothly.

Conclusion
In conclusion, repairing some basic issues of a mini excavator isn’t complicated. You can fix many common problems by following these five easy steps:
- Cleaning or replacing the air filter
- Checking the hydraulic fluid
- Inspecting the tracks
- Maintaining the cooling system
- Replacing the fuel and oil
Regular maintenance and prompt repairs will extend the life of your mini excavator and keep it running efficiently for years to come. Whether you’re a contractor working on a construction site or a DIY enthusiast tackling a landscaping project, learning how to fix basic mini excavators is a valuable skill that can save both your time and money.
“Keeping your mini excavators in good working condition ensures they perform at their best when you need them most.”


Very useful and informative…
Thank you!